In my last post, I described how to identify the decryption key, the encrypted blob and how the decryption algorithm works in a packed TrueBot sample. Doing this manually with help of your favorite Disassembler/Decompiler is quite easy, but I guess, that’s not why you are here. What we want is a static unpacker, written in Python, without using any external tools or too many dependencies (except Malduck 🦆).
Depending on the sample you’re analyzing, writing a static unpacker can be a challenging task, especially if you’re dealing with several layers of encryption, junk code, control-flow obfuscation and so on.
Fortunately, TrueBot doesn’t make it particularly difficult for us here. Nevertheless, the code will end up looking a bit ugly since we want to write an unpacker for all samples available to us. But maybe that is just because of my programming style. By the way, I do not use a lot of error handling in my code so please be merciful.
In a nutshell, the basic methodology for our code looks as follows:
- Identify the encrypted blob, ideally with its length.
- Locate and parse the decryption key and the value for the
ANDoperation. - Decrypt and save the dump.
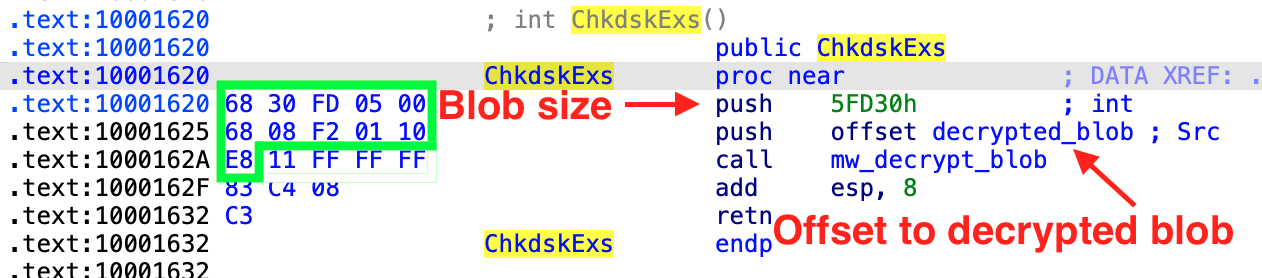
As I already described in Part I of my analysis, the most common variant in those packed samples is a DLL Export which directly calls the decryption function with the offset of the decrypted blob and the blob size as arguments.
This call can be identified easily and without false positives, at least in the samples I analyzed. In order to accomplish this, we use Malduck, our “ducky companion in malware analysis journeys”.
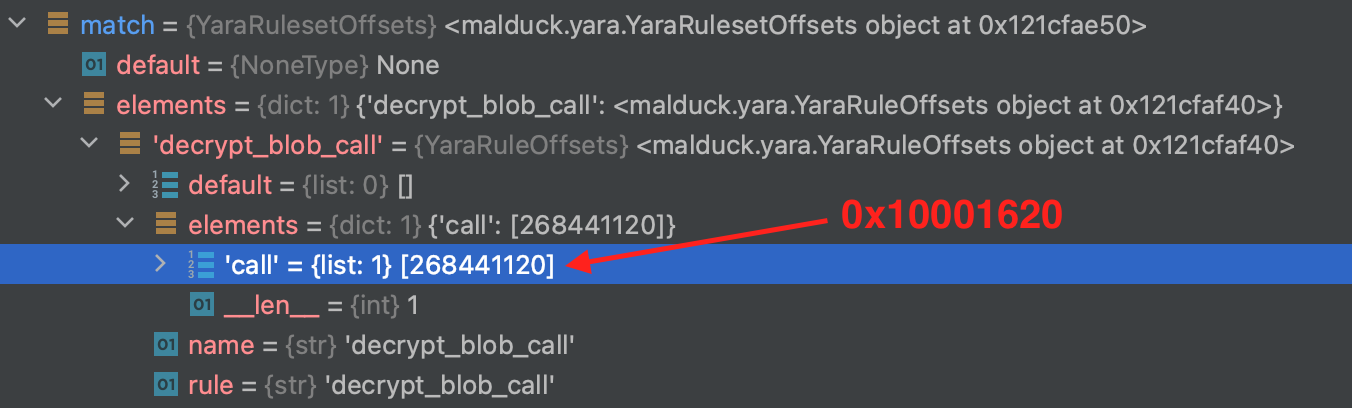
To find the call, we utilize Malduck’s built-in Yara wrapper, looking for the two pushes and the beginning of the call, see the green box in the screenshot above. Since we don’t know the exact size of the blob, we’re using the wildcards ?? and estimate that the size is between 0x40000 and 0x6FFFF.pe = malduck.procmempe.from_file(filename=abs_file_path, image=True)
s1 = YaraString('68 ?? ?? (04 | 05 | 06) 00 68 ?? ?? ?? ?? E8',
type=YaraString.HEX)
decrypt_blob_call = Yara(name="decrypt_blob_call", strings={"call": s1}, condition="all of them")
match = pe.yarav(ruleset=decrypt_blob_call)
offset = None
if match:
for _, v in match.elements["decrypt_blob_call"].elements.items():
offset = v[0] # there should only be one match (hopefully)
Our file is loaded as memory-mapped PE file, so we will use yarav() to perform yara matching region-wise.
This will also help us to debug more easily because we can confirm matching offsets in our Disassembler (check the hex value against the virtual address in the screenshot above).
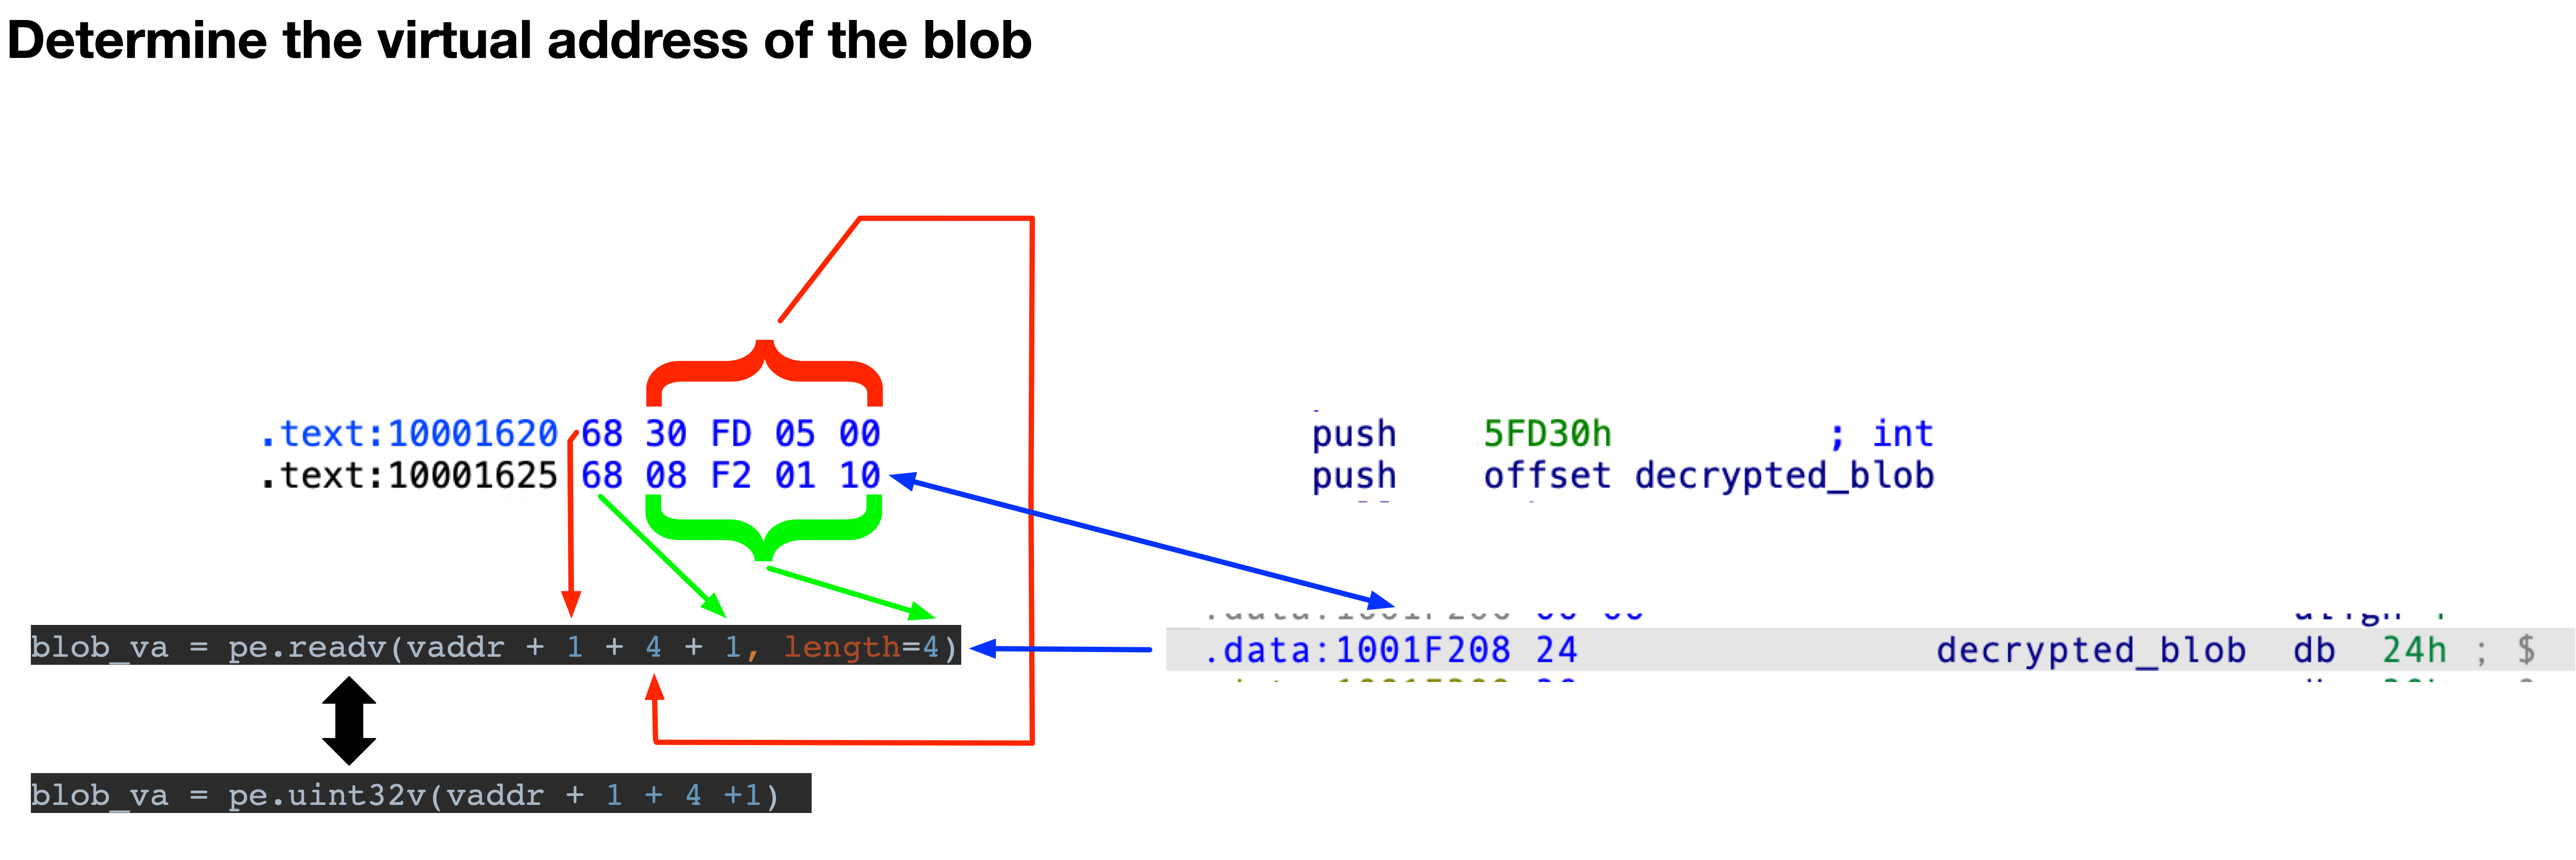
Since we are now (0x10001620 in this example) near the position where the decryption function is called, we can determine the length and the virtual address of the encrypted blob and also get the virtual address of the decryption function.
To get the blob size, we need to read 4 bytes, starting from the identified address before +1 (because of the push opcode), see the screenshot below.
You can either call pe.readv(addr, length) or just use Malduck’s handy helper functions like uint32v(addr) which for example reads an unsigned 32-bit value at the given address.blob_size = pe.uint32v(vaddr + 1) #Read unsigned 32-bit value at address.

Getting the virtual address where the decrypted blob is stored, works similar.blob_va = pe.uint32v(vaddr + 1 + 4 + 1)
Now we only need the key and the value for the “AND” operation to decrypt the blob. The approach is similar to the one already described above. We know the virtual address of the decryption functions and have an approximate idea how big the function is. Therefore, we can now search for the required information in between this function, see the code to find the key here and to find the value for the “AND” operation here.
After collecting the blob and the decryption material, we should be able to decrypt the blob with help of the decryption function mentioned in Part I of this series.
I’ve published the whole code on github and tested against all the samples available to me. When running the script on all samples, it should look like this. 
Like most static unpackers/config extractors/etc., this code might break easily if some bytes at specific positions change and you will probably have to continuously adapt the Unpacker to new samples. I am therefore very interested in new samples. If someone has some, please get in touch with me.
Now that we have a bunch of unpacked samples, the next post in this series will focus on TrueBot’s capabilities before we then write a Config Extractor using Python and Malduck.